Introduction
In this post, we will discuss about the following two topics.
- How to setup Gradle Eclipse Plugin
- How to Develop Java Simple Example with Gradle Eclipse Plugin
Gradle uses its own DSL (Domain Specific Language) Groovy-based scripts to write build scripts. Unlike Ant and Maven, it does not use complex XML build scripts. Gradle is developed using Java and configuration elements are developed using Groovy. It uses Groovy to write build scripts. Prerequisite: To understand Gradle DSL scripts, we should have some knowledge about Groovy basics. Please go through some Groovy tutorials before going through this post. NOTE: Groovy is a Dynamic Programming Language and its syntax is similar to Java programming language. It is very easy to learn for a Java Developer.
Matching infrastructure at centron
Node applications need somewhere to run: ccloud³ VMs with full root access from €3.12 per month – or as a managed server if you would rather not run it yourself. Rent a cloud server →
Gradle Build Scripts
Now we will start writing simple Gradle build scripts. As we are already familiar with Ant and Maven build scripts, we know what is the starting point to start writing build scripts. First and foremost thing we should know is Gradle default build script file name. Like Ant’s default build script name is build.xml and Maven default build script name is pom.xml, Gradle default build script name is build.gradle. When we run gradle command, it searches for this default file available in the current working directory. If it finds, it executes that build script. Otherwise, displays some useful default help message. We will use Eclipse Gradle Plugin to develop and test all our Gradle examples. Before working with simple examples, let’s first setup Gradle Plugin with Eclipse IDE.
Gradle Eclipse Plugin Installation
I’m using Eclipse 4.4 Luna IDE. You can use the same steps for other Eclipse versions too.
- Open “Eclipse Marketplace…” from “Help” menu.
- Type “gradle” in Search box as shown below.
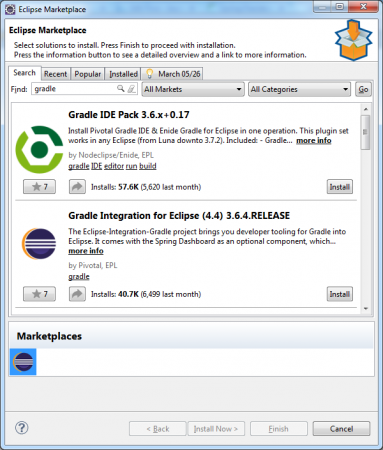
- Click on “Install” button for “Gradle Integration for Eclipse(4.4) 3.6.4.RELEASE” option to install Gradle Eclipse Plugin.
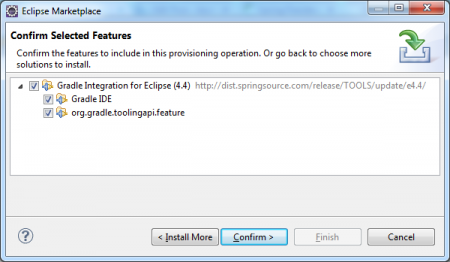
- Accept license by clicking the radio button and click on “Finish” button.
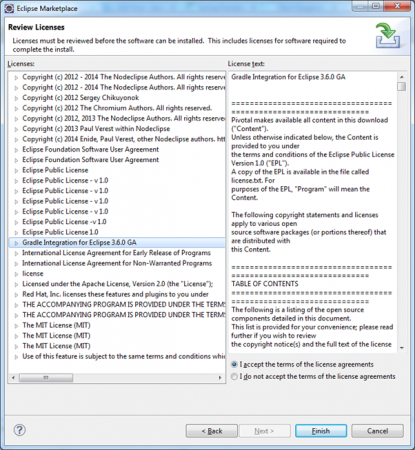
This step installs Eclipse Gradle plugin and restarts Eclipse IDE. Now we can start developing applications using Gradle Build tool.
Gradle Eclipse Plugin Example
Now we are going to develop a simple Java example with Eclipse Gradle Plugin. Please use the following steps to develop and test this application.
- Click on “File >> New >> Other” to open “New” Wizard window to create a new Java Gradle Project.
- Select “Gradle Project” option under “Gradle” Category.
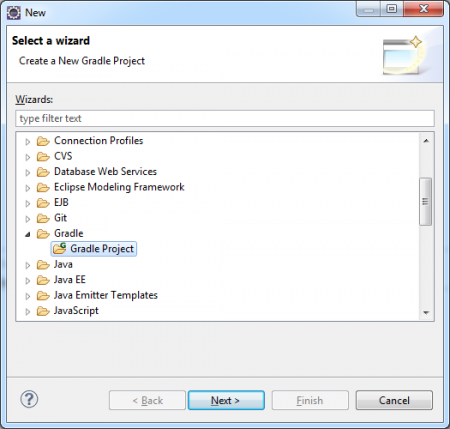
- Click on “Next” Button to see “New Gradle Project” Window.
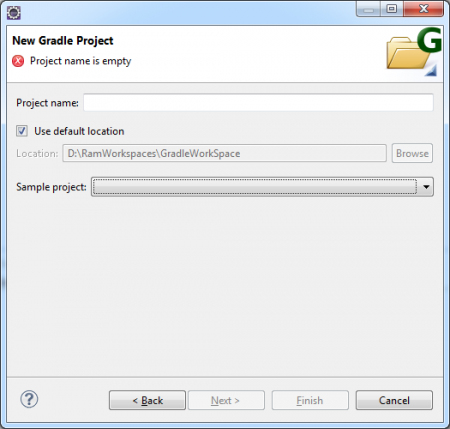
- In “New Gradle Project” Window, provide the following details:
- Project name: “JavaGradleSimpleExample”
- Select “Java Quickstart” option from “Sample project” Dropdown box.
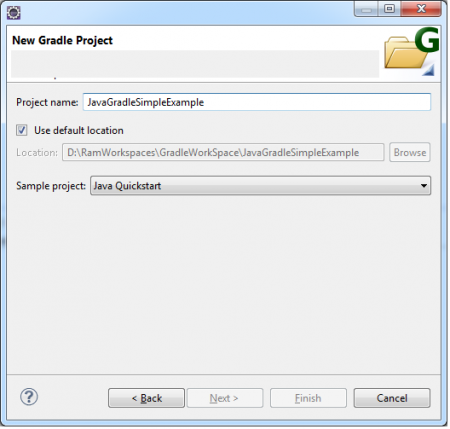
- Click on “Finish” Button to create new Java Gradle project.
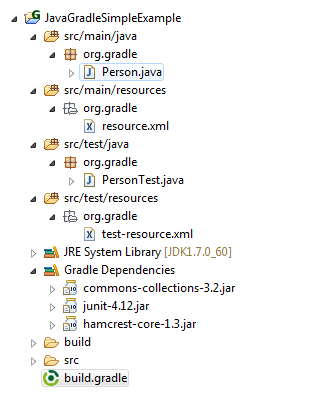
Now our Java Gradle project structure looks like below image. If you observe this project structure, Gradle Project is the same as Maven Project structure. Yes, Gradle uses Maven Project structure but instead of pom.xml file, we have build.gradle file.
build.gradle File Content
apply plugin: 'java'
apply plugin: 'eclipse'

sourceCompatibility = 1.5
version = '1.0'
jar {
    manifest {
        attributes 'Implementation-Title': 'Gradle Quickstart',
                   'Implementation-Version': version
    }
}

repositories {
    mavenCentral()
}

dependencies {
    compile group: 'commons-collections', name: 'commons-collections', version: '3.2'
    testCompile group: 'junit', name: 'junit', version: '4.+'
}

test {
    systemProperties 'property': 'value'
}

uploadArchives {
    repositories {
       flatDir {
           dirs 'repos'
       }
    }
}
Default Java Gradle Project
This default Java Gradle project creates one Java file: Person.java and one JUnit test class PersonTest.java.
Person.java
package org.gradle;

import org.apache.commons.collections.list.GrowthList;

public class Person {
    private final String name;

    public Person(String name) {
        this.name = name;
        new GrowthList();
    }

    public String getName() {
        return name;
    }
}
PersonTest.java
package org.gradle;

import org.junit.Test;
import static org.junit.Assert.*;

public class PersonTest {
    @Test
    public void canConstructAPersonWithAName() {
        Person person = new Person("Larry");
        assertEquals("Larry", person.getName());
    }
}
Running the Application
- Right click on our “JavaGradleSimpleExample” Project’s
build.gradlefile and select “Run As” >> “Gradle build” option.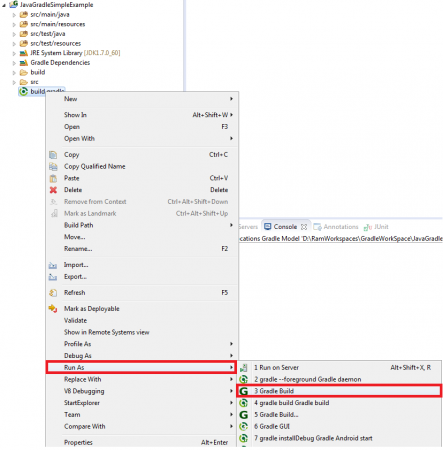
- It opens “Edit Configuration” Wizard window.
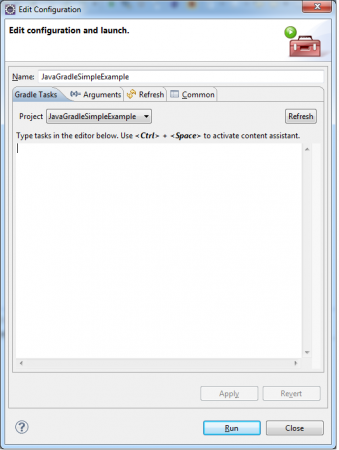
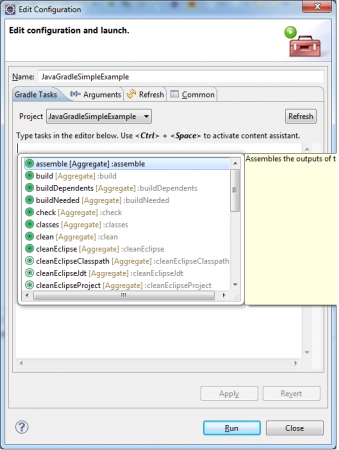
- Type required Gradle commands in the editor below. Use the “+” button to activate content assistant.
- Type “build” Gradle command in the Text editor.
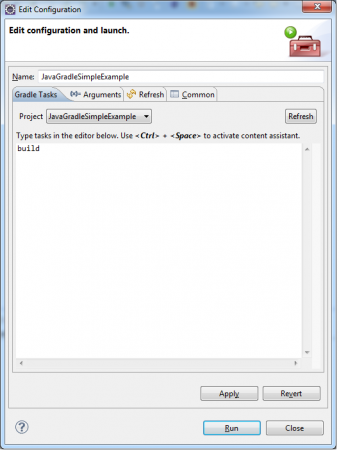
- Click on “Apply” button to apply changes. Then click on “Run” button to start the Gradle build command “gradle build”.
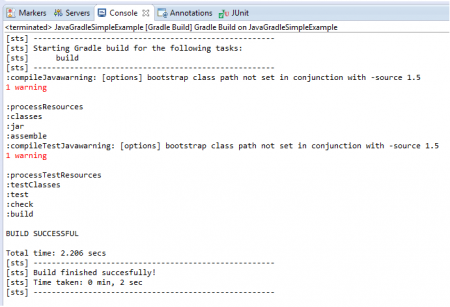
If you observe the console output, it shows “BUILD SUCCESSFUL” message. That means our Gradle build command has executed successfully.
Steps Performed by Gradle Build Command
- Compiles both Java files.
- Generates a JAR file named “JavaGradleSimpleExample-1.0.jar” at
${PROJECT_ROOT_DIR}\build\libs.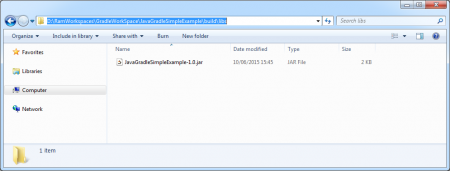
- Executes the JUnit file.
If something goes wrong in any one of these steps, we will see “BUILD FAILED” error message. That’s it for Gradle Eclipse plugin example. We will explore build.gradle file content and Gradle commands in coming posts.
Testen Sie Ihr Setup auf ccloud³
Registrieren Sie sich in der ccloud³ und erhalten Sie 200 € Startguthaben für Ihr Projekt – z. B. für eine PostgreSQL-VM mit automatischen Backups.