The Apache HTTP server is the most widely used web server in the world. It provides many powerful features including dynamically loadable modules, robust media support, and extensive integration with other popular software.
In this guide, you’ll install an Apache web server on a Debian 11 server.
Prerequisites
Before you begin this guide, you will need a Debian 11 server set up with a non-root user with sudo privileges and a firewall enabled to block non-essential ports.
Once you’re done setting this up, log in as your non-root user and proceed to the first step.
Matching infrastructure at centron
No hardware needed to follow along: ccloud³ VMs with full root access start at €3.12 per month, billed by the hour and ready in seconds. Rent a cloud server →
Step 1 — Installing Apache
Apache is available within Debian’s default software repositories, making it possible to install it using conventional package management tools.
Begin by updating the local package index to reflect the latest upstream changes:
sudo apt updateThen, install the apache2 package:
sudo apt install apache2After confirming the installation, apt will install Apache and all required dependencies.
Step 2 — Adjusting the Firewall
Before testing Apache, it’s necessary to modify the firewall settings to allow outside access to the default web ports. If you followed the instructions in the prerequisites, you should have a UFW firewall configured to restrict access to your server.
During installation, Apache registers itself with UFW to provide a few application profiles that can be used to enable or disable access to Apache through the firewall.
List the UFW application profiles by running the following:
sudo ufw app listYour output will be a list of the application profiles:
Available applications:
  AIM
  Bonjour
  CIFS
  ...
  WWW
  WWW Cache
  WWW Full
  WWW Secure
  ...
The Apache profiles begin with WWW:
- WWW: Opens only port 80 (normal, unencrypted web traffic)
- WWW Cache: Opens only port 8080 (sometimes used for caching and web proxies)
- WWW Full: Opens both port 80 (unencrypted traffic) and port 443 (TLS/SSL encrypted traffic)
- WWW Secure: Opens only port 443 (TLS/SSL encrypted traffic)
Since you haven’t configured SSL for your server yet in this guide, you only need to allow traffic on port 80:
sudo ufw allow 'WWW'You can verify the change by checking the status:
sudo ufw statusThe output will provide a list of allowed HTTP traffic:
Status: active

To                         Action      From
--                         ------      ----
OpenSSH                    ALLOW       Anywhere
WWW                        ALLOW       Anywhere
OpenSSH (v6)               ALLOW       Anywhere (v6)
WWW (v6)                   ALLOW       Anywhere (v6)
As indicated by the output, the profile has been activated to allow access to the Apache web server.
Step 3 — Checking your Web Server
At the end of the installation process, Debian 11 starts Apache. The web server should already be up and running.
Make sure the service is active by running the command for the systemd init system:
sudo systemctl status apache2Output:
● apache2.service - The Apache HTTP Server
     Loaded: loaded (/lib/systemd/system/apache2.service; enabled; vendor prese>
     Active: active (running) since Wed 2022-07-06 22:05:45 UTC; 23s ago
       Docs: https://httpd.apache.org/docs/2.4/
   Main PID: 2796 (apache2)
      Tasks: 55 (limit: 9509)
     Memory: 21.0M
        CPU: 67ms
     CGroup: /system.slice/apache2.service
             ├─2796 /usr/sbin/apache2 -k start
             ├─2798 /usr/sbin/apache2 -k start
             └─2799 /usr/sbin/apache2 -k start
This output confirms that the service has started successfully. However, the best way to test this is to request a page from Apache.
You can access the default Apache landing page to confirm that the software is running properly through your IP address. If you do not know your server’s IP address, you can get it a few different ways from the command line.
Try writing the following at your server’s command prompt:
hostname -IYou will receive a few addresses separated by spaces. You can try each in your web browser to determine if they work.
Another option is using the icanhazip.com tool, which is a website that, when accessed, returns your machine’s public IP address as read from another location on the internet. If you don’t have curl already installed, you can install it with the following command:
sudo apt install curlThen, use curl to retrieve icanhazip.com using IPv4:
curl -4 icanhazip.comWhen you have your server’s IP address, enter it into your browser’s address bar:
http://your_server_ipYou should see the default Debian 11 Apache web page:
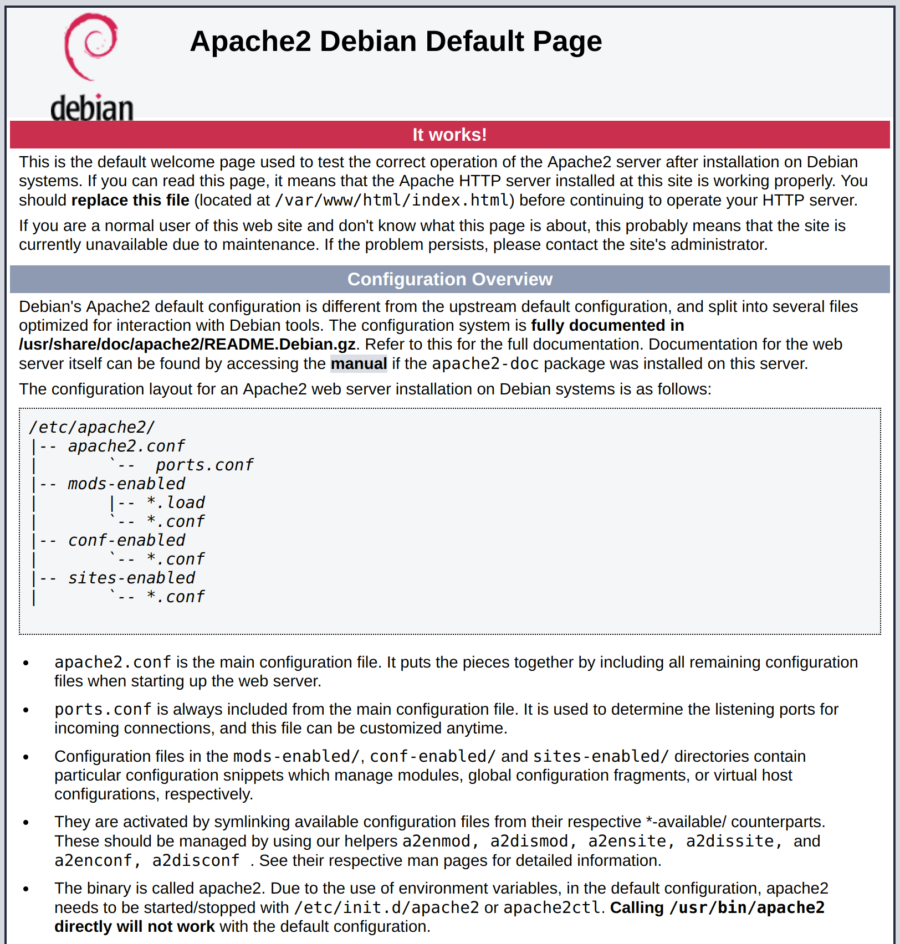
This page indicates that Apache is working correctly. It also includes some basic information about important Apache files and directory locations.
Step 4 — Managing the Apache Process
Now that you have your web server up and running, let’s review some basic management commands using systemctl.
To stop your web server, run:
sudo systemctl stop apache2Start the web server when it is stopped with:
sudo systemctl start apache2To stop and then start the service again, run:
sudo systemctl restart apache2If you are only making configuration changes, Apache can often reload without dropping connections. To do this, use the following command:
sudo systemctl reload apache2By default, Apache is configured to start automatically when the server boots. If this is not what you want, disable this behavior by running:
sudo systemctl disable apache2To re-enable the service to start up at boot, run:
sudo systemctl enable apache2Apache will now start automatically when the server boots again.
Step 5 — Setting Up Virtual Hosts (Recommended)
When using the Apache web server, you can use virtual hosts (similar to server blocks in Nginx) to encapsulate configuration details and host more than one domain from a single server. We will set up a domain called your_domain, but you should replace this with your own domain name.
Apache on Debian 11 has one server block enabled by default that is configured to serve documents from the /var/www/html directory. While this works well for a single site, it can become unwieldy if you are hosting multiple sites. Instead of modifying /var/www/html, create a directory structure within /var/www for a your_domain site, leaving /var/www/html in place as the default directory to be served if a client request doesn’t match any other sites.
Create the directory for your_domain as follows:
sudo mkdir -p /var/www/your_domainNext, assign ownership of the directory to the user you’re currently signed in as with the $USER environment variable:
sudo chown -R $USER:$USER /var/www/your_domainThe permissions of your web roots should be correct if you haven’t modified your umask value, which sets default file permissions. To ensure that your permissions are correct and allow the owner to read, write, and execute the files while granting only read and execute permissions to groups and others, you can input the following command:
sudo chmod -R 755 /var/www/your_domainConfigure Virtual Host
Next, create a sample index.html page using your preferred text editor. Here, we’ll use nano:
nano /var/www/your_domain/index.htmlInside, add the following sample HTML:
<html>
    <head>
        <title>Welcome to your_domain!</title>
    </head>
    <body>
        <h1>Success!  The your_domain virtual host is working!</h1>
    </body>
</html>
Save and close the file when you are finished. If you’re using nano, you can do this by pressing CTRL + X, then Y, and ENTER.
In order for Apache to serve this content, it’s necessary to create a virtual host file with the correct directives. Instead of modifying the default configuration file located at /etc/apache2/sites-available/000-default.conf directly, make a new one at /etc/apache2/sites-available/your_domain.conf:
sudo nano /etc/apache2/sites-available/your_domain.confInsert the following configuration block, which is similar to the default but updated for your new directory and domain name:
<VirtualHost *:80>
    ServerAdmin webmaster@localhost
    ServerName your_domain
    ServerAlias www.your_domain
    DocumentRoot /var/www/your_domain
    ErrorLog ${APACHE_LOG_DIR}/error.log
    CustomLog ${APACHE_LOG_DIR}/access.log combined
</VirtualHost>
Notice that we’ve updated the DocumentRoot to our new directory and ServerAdmin to an email that the your_domain site administrator can access. We’ve also added two directives: ServerName, which establishes the base domain that will match this virtual host definition, and ServerAlias, which defines further names that will match as if they were the base name.
Save and close the file when you are finished.
Now enable the file with the a2ensite tool:
sudo a2ensite your_domain.confDisable the default site defined in 000-default.conf:
sudo a2dissite 000-default.confNext, test for configuration errors:
sudo apache2ctl configtestYou should receive the following output:
Output
AH00558: apache2: Could not reliably determine the server's fully qualified domain name, using 127.0.1.1. Set the 'ServerName' directive globally to suppress this message
Syntax OK
Restart Apache to implement your changes:
sudo systemctl restart apache2Apache will now be serving your domain name. You can test this by navigating to http://your_domain, where you will see something like the following:

Step 6 — Getting Familiar with Important Apache Files and Directories
Now that you know how to manage the Apache service itself, you should take a few minutes to familiarize yourself with a few important directories and files.
Content
- /var/www/html: The actual web content, which by default only consists of the default Apache page you saw earlier, is served out of the
/var/www/htmldirectory. This can be changed by altering Apache configuration files.
Server Configuration
- /etc/apache2: The Apache configuration directory. All of the Apache configuration files reside here.
- /etc/apache2/apache2.conf: The main Apache configuration file. This can be modified to make changes to the Apache global configuration. This file is responsible for loading many of the other files in the configuration directory.
- /etc/apache2/ports.conf: This file specifies the ports that Apache will listen on. By default, Apache listens on port 80 and additionally listens on port 443 when a module providing SSL capabilities is enabled.
- /etc/apache2/sites-available/: The directory where per-site virtual hosts can be stored. Apache will not use the configuration files found in this directory unless they are linked to the
sites-enableddirectory. Typically, all server block configuration is done in this directory and then enabled by linking to the other directory with thea2ensitecommand. - /etc/apache2/sites-enabled/: The directory where enabled per-site virtual hosts are stored. Typically, these are created by linking to configuration files found in the
sites-availabledirectory with thea2ensite. Apache reads the configuration files and links found in this directory when it starts or reloads to compile a complete configuration. - /etc/apache2/conf-available/, /etc/apache2/conf-enabled/: These directories have the same relationship as the
sites-availableandsites-enableddirectories, but are used to store configuration fragments that do not belong in a virtual host. Files in theconf-availabledirectory can be enabled with thea2enconfcommand and disabled with thea2disconfcommand. - /etc/apache2/mods-available/, /etc/apache2/mods-enabled/: These directories contain the available and enabled modules, respectively. Files ending in
.loadcontain fragments to load specific modules, while files ending in.confcontain the configuration for those modules. Modules can be enabled and disabled using thea2enmodanda2dismodcommands.
Server Logs
- /var/log/apache2/access.log: By default, every request to your web server is recorded in this log file unless Apache is configured to do otherwise.
- /var/log/apache2/error.log: By default, all errors are recorded in this file. The
LogLeveldirective in the Apache configuration specifies how much detail the error logs will contain.
Conclusion
Now that you have your web server installed, you have many options for the type of content you can serve and the technologies you can use to create a richer experience.
Testen Sie Ihr Setup auf ccloud³
Registrieren Sie sich in der ccloud³ und erhalten Sie 200 € Startguthaben für Ihr Projekt – z. B. für eine PostgreSQL-VM mit automatischen Backups.