Spring Boot Actuator Endpoints lets us monitor and interact with our application. Spring Actuator is a Spring Boot sub-module and provides built-in endpoints that we can enable and disable for our application.
Try it yourself: cloud servers from €3.12/month
ccloud³ VMs from German data centers – deployed in seconds, billed by the hour, with a €200 starting credit for new accounts. Launch a server →
Overview of Spring Boot Actuator Endpoints
Spring Boot Actuator Endpoints are exposed over JMX and HTTP, most of the times we use HTTP based Actuator endpoints because they are easy to access over the browser, CURL command, shell scripts etc. Some of the useful actuator endpoints are:
- beans: this endpoint returns the list of all the beans configured in our application.
- env: provides information about the Spring Environment properties.
- health: Shows application health
- info: Displays application information, we can configure this in Spring environment properties.
- mappings: Displays the list of all @RequestMapping paths.
- shutdown: allows us to gracefully shutdown the application.
- threaddump: provides the thread dump of the application.
You can get the complete list of spring actuator endpoints from here.
Spring Actuator Endpoints Security
Only “health” and “info” endpoints are exposed without any security, for accessing all other endpoints we need to configure our application for spring security. This is very easy to achieve, we will get to it in the later part of the tutorial.
Enable Spring Actuator Endpoints
When we add Spring Actuator Dependencies to our spring boot project, it automatically enables actuator endpoints. Add below dependencies to your spring application to enable spring boot actuator endpoints.
<dependency>
    <groupId>org.springframework.boot</groupId>
    <artifactId>spring-boot-starter-actuator</artifactId>
</dependency>
Now when you will run the application, you will see actuator endpoints being mapped in the logs.
2018-06-19 15:23:20.715  INFO 6493 --- [main] o.s.b.a.e.web.EndpointLinksResolver: Exposing 2 endpoint(s) beneath base path '/actuator'
2018-06-19 15:23:20.723  INFO 6493 --- [main] s.b.a.e.w.s.WebMvcEndpointHandlerMapping : Mapped "{[/actuator/health],methods=[GET],produces=[application/vnd.spring-boot.actuator.v2+json || application/json]}" onto public java.lang.Object org.springframework.boot.actuate.endpoint.web.servlet.AbstractWebMvcEndpointHandlerMapping$OperationHandler.handle(javax.servlet.http.HttpServletRequest,java.util.Map<java.lang.String, java.lang.String>)
2018-06-19 15:23:20.724  INFO 6493 --- [main] s.b.a.e.w.s.WebMvcEndpointHandlerMapping : Mapped "{[/actuator/info],methods=[GET],produces=[application/vnd.spring-boot.actuator.v2+json || application/json]}" onto public java.lang.Object org.springframework.boot.actuate.endpoint.web.servlet.AbstractWebMvcEndpointHandlerMapping$OperationHandler.handle(javax.servlet.http.HttpServletRequest,java.util.Map<java.lang.String, java.lang.String>)
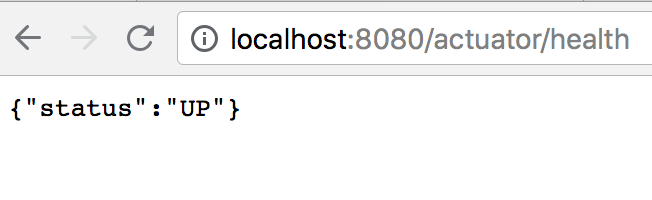
Notice that only two endpoints - health and info has been mapped. Below image shows the output of these actuator endpoints.
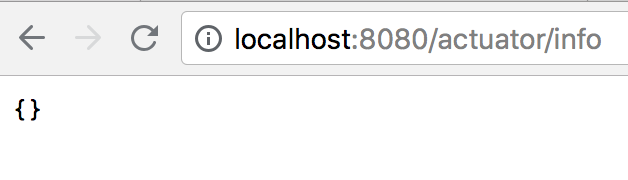
Did you noticed that there is no data in the /actuator/info, it’s because we haven’t configured them. Just add following properties to your application.properties file.
info.app.name=Spring Actuator Example
info.app.java.version=10
info.app.type=Spring Boot
Restart the application and you will get following output:
Customizing Actuator End Points Base Path
By default base-path of actuator endpoints is /actuator, we can change it to any other value by setting management.endpoints.web.base-path in application properties file.
management.endpoints.web.base-path=/managementExposing Other Actuator Endpoints
We can enable and disable other actuator endpoints through property files. If you want to enable all actuator endpoints, then add following property.
management.endpoints.web.exposure.include=*To enable only specific actuator endpoints, provide the list of endpoint id.
management.endpoints.web.exposure.include=health,info,beans,envSpring Security for Actuator Endpoints
Note that we need to add Spring Security to our application for enabling additional endpoints because all other endpoints need at least basic authentication. Add following dependency for spring security in your application.
<dependency>
    <groupId>org.springframework.boot</groupId>
    <artifactId>spring-boot-starter-security</artifactId>
</dependency>
Also, add spring security username and password in application properties file.
spring.security.user.name=pankaj
spring.security.user.password=pankaj
Restart the application and you will see additional endpoints being mapped.
2018-06-19 16:18:22.211  INFO 6627 --- [main] s.b.a.e.w.s.WebMvcEndpointHandlerMapping : Mapped "{[/management/beans],methods=[GET],produces=[application/vnd.spring-boot.actuator.v2+json || application/json]}" onto public java.lang.Object org.springframework.boot.actuate.endpoint.web.servlet.AbstractWebMvcEndpointHandlerMapping$OperationHandler.handle(javax.servlet.http.HttpServletRequest,java.util.Map<java.lang.String, java.lang.String>)
2018-06-19 16:18:22.212  INFO 6627 --- [           main] s.b.a.e.w.s.WebMvcEndpointHandlerMapping : Mapped "{[/management/env],methods=[GET],produces=[application/vnd.spring-boot.actuator.v2+json || application/json]}" onto public java.lang.Object org.springframework.boot.actuate.endpoint.web.servlet.AbstractWebMvcEndpointHandlerMapping$OperationHandler.handle(javax.servlet.http.HttpServletRequest,java.util.Map<java.lang.String, java.lang.String>)
2018-06-19 16:18:22.212  INFO 6627 --- [           main] s.b.a.e.w.s.WebMvcEndpointHandlerMapping : Mapped "{[/management/env/{toMatch}],methods=[GET],produces=[application/vnd.spring-boot.actuator.v2+json || application/json]}" onto public java.lang.Object org.springframework.boot.actuate.endpoint.web.servlet.AbstractWebMvcEndpointHandlerMapping$OperationHandler.handle(javax.servlet.http.HttpServletRequest,java.util.Map<java.lang.String, java.lang.String>)
Now when you will try to access the secured actuator endpoints, you will have to provide login credentials.
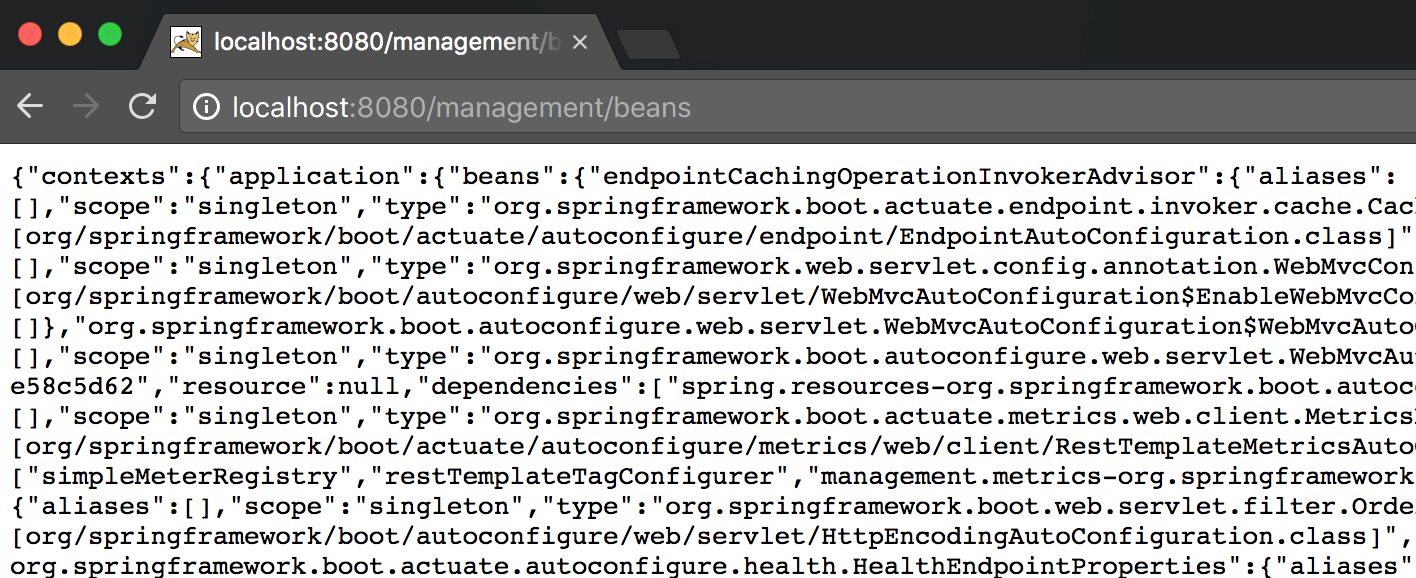
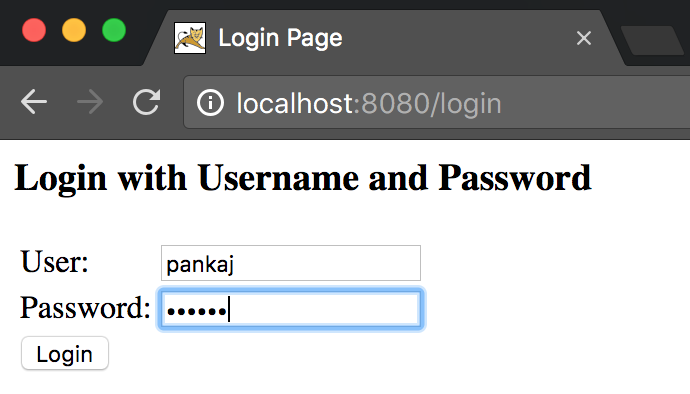 Below images shows the response of beans and env/java.home endpoints.
Spring Actuator Custom Endpoints
One of the great features of Spring Framework is that it’s very easy to extend. We can create our own custom actuator endpoints using @Endpoint annotation on a class. Then we have to use @ReadOperation, @WriteOperation, or @DeleteOperation annotations on the methods to expose them as actuator endpoint bean. We can create technology-specific Endpoints using @JmxEndpoint and @WebEndpoint annotations. Here is an example of our own custom spring actuator endpoint.
package com.journaldev.spring;

import org.springframework.boot.actuate.endpoint.annotation.Endpoint;
import org.springframework.boot.actuate.endpoint.annotation.ReadOperation;
import org.springframework.context.annotation.Bean;
import org.springframework.stereotype.Component;

@Endpoint(id="myendpoint")
@Component
public class MyCustomEndpoints {

    @ReadOperation
    @Bean
    public String hi() {
        return "Hi from custom endpoint";
    }
}
Did you notice the endpoint id? We also need to configure this in the list of actuator endpoints to be enabled. Update following properties in application.properties file.
management.endpoints.web.exposure.include=health,info,beans,env,myendpointNow when you will start the application, check for this new endpoint being mapped in the logs.
2018-06-19 17:06:59.743 INFO 6739 --- [main] s.b.a.e.w.s.WebMvcEndpointHandlerMapping : Mapped "{[/management/myendpoint],methods=[GET],produces=[application/vnd.spring-boot.actuator.v2+json || application/json]}" onto public java.lang.Object org.springframework.boot.actuate.endpoint.web.servlet.AbstractWebMvcEndpointHandlerMapping$OperationHandler.handle(javax.servlet.http.HttpServletRequest,java.util.Map<java.lang.String, java.lang.String>)Below image shows the output when we invoke our custom actuator endpoint.
Conclusion
Spring Boot Actuator is a powerful tool for monitoring and managing Spring Boot applications. With the latest updates in Spring Boot 3, enhanced security options and new monitoring features are available.
Integrating with ccloud³ provides a scalable, cloud-based environment for Spring Boot microservices.
Further Resources:
Testen Sie Ihr Setup auf ccloud³
Registrieren Sie sich in der ccloud³ und erhalten Sie 200 € Startguthaben für Ihr Projekt – z. B. für eine PostgreSQL-VM mit automatischen Backups.