Spring Boot CLI (Command Line Interface) is a Spring Boot software to run and test Spring Boot applications from command prompt. When we run Spring Boot applications using CLI, then it internally uses Spring Boot Starter and Spring Boot AutoConfigurate components to resolve all dependencies and execute the application. It internally contains Groovy and Grape (JAR Dependency Manager) to add Spring Boot Defaults and resolve all dependencies automatically. We are going to discuss about CLI Installation, CLI Setup and CLI commands in Windows Environment. It’s almost similar to other Environment too.
Spring Boot CLI Installation
We can install Spring Boot CLI software using either Windows Installer or Zip file. Both approaches are easy to install and will give us same Spring Boot CLI software. We are going to use easy method that is using Zip file. We are going to use Spring Boot Latest version: 1.2.3.RELEASE We can download Spring Boot CLI software at: https://start.spring.io/ (It is a Spring Initilizr WebInterface. We will discuss about this component in detail in coming posts.) Please follow these steps to Install and setup Spring Boot CLI software in Windows Environment.
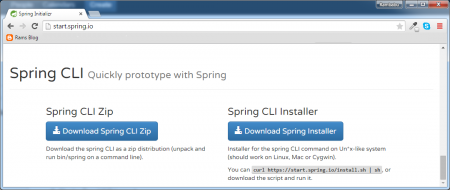
- Download Spring Boot CLI zip file using Spring Initilizr Click on “Download Spring CLI Zip” button as shown below:
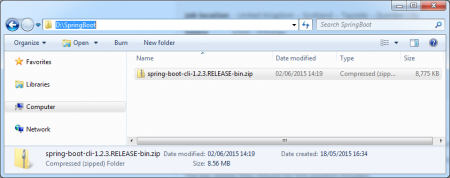
- Once we download Spring Boot CLI Zip file into our local FileSystem, it looks like this.
 Extract spring-boot-cli-1.2.3.RELEASE.zip file into our local FileSystem.
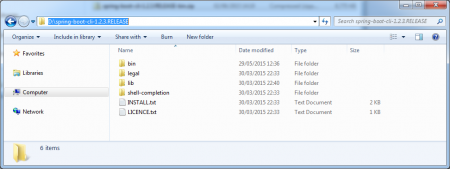 Set Spring Boot CLI Environment Variables in Windows System as shown below.
set PATH=D:\spring-boot-cli-1.2.3.RELEASE\bin;%PATH%- Execute the below command to verify our installation process.
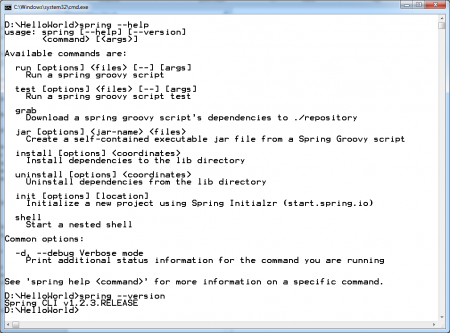 We can use “spring --version” to know the Spring Boot CLI Version as shown below.
spring --version- We can use “spring --help” to know the Spring Boot CLI Version as shown below.
spring --help
Now our Spring Boot CLI Installation process is done successfully. Before discussing about Spring Boot “HelloWorld” Example, first we will see how to run Groovy scripts from command prompt.
Matching infrastructure at centron
No hardware needed to follow along: ccloud³ VMs with full root access start at €3.12 per month, billed by the hour and ready in seconds. Rent a cloud server →
Spring Boot “spring” command
Spring Boot CLI Software provides a “spring” command to run Spring Boot Groovy scripts from Command Prompt. As we saw just before, Spring Boot “spring --help” command have many options to use this command for different purposes. One important option, we are going to use here is “run” option. “spring” command syntax:
spring run <SpringBoot-Groovy-Scriptname>Here is a Groovy Script filename of a Spring Boot Application. We will use this command to execute our Spring Boot HelloWorld Example. It’s time to work with Simple HelloWorld Spring Boot Example with Spring Boot CLI.
Spring Boot HelloWorld Example
Now we are going to develop a Spring Boot MVC RestController Example. It was the first example published on Twitter from Pivotal team to demonstrate Spring Boot Framework power. Please follow the following steps to develop a Spring Boot HelloWorld Example:
- Create a “HelloWorld” Folder in our Local FileSystem to place our groovy scripts.
- Develop a Groovy script file using the following content
@RestController
        class HelloWorld {
          @RequestMapping("/")
          String hello() {
            "Hello JournalDev World."
          }
        }
Name this file as HelloWorld.groovy. Here “.groovy” extension is mandatory. Code Explanation
Defined a REST Controller using Spring 4 MVC @RestController annotation.
Defined a Mapping URL “/” using Spring MVC @RequestMapping annotation.
Defined a method to return a String to a Client or Web Browser.
Code Observations If we observe our HelloWorld.groovy, we can find the following important points.
- No imports
- No other XML configuration to define Spring MVC Components like Views,ViewResolver etc.
- No web.xml and No DispatcherServlet declaration
- No build scripts to create our Application war file
- No need to build war file to deploy this application
Then who will provide all these things to our Spring Boot HelloWorld application? First run the application and see the results, then we will answer this question.- Now Spring Boot HelloWorld Example folder looks like this.
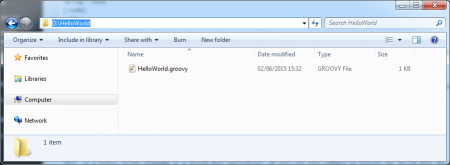 Now our Spring Boot HelloWorld Example is ready with Spring MVC RestController. It’s time to run and test this example to know the Power of Spring Boot Framework.
Run Spring Boot HelloWorld Example
Please follow the following steps to test our Spring Boot HelloWorld Example application:
- Open command prompt at “HelloWorld” Folder in our Local FileSystem.
- Execute the following command
spring run HelloWorld.groovy - Observe the output at “spring run” command console.
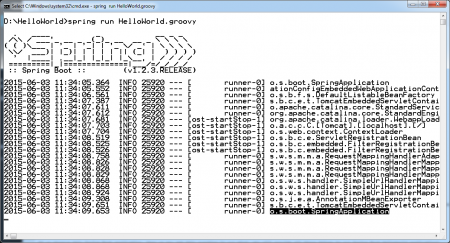
we observe here, when we execute “spring run HelloWorld.groovy”, it starts Embedded Tomcat server at Default port number: 8080. Now our Spring Boot HelloWorld Example application is up and running. It’s time to test it now.
NOTE: If we observe the above screen shot, I have highlighted “SpringApplication” class file. Here o.s.boot.SpringApplication means org.springframework.boot.SpringApplication class. What is this SpringApplication? What is the use of SpringApplication? Please refer my upcoming posts to answer these questions. Open browser and access the following link. Access this URL: https://localhost:8080/
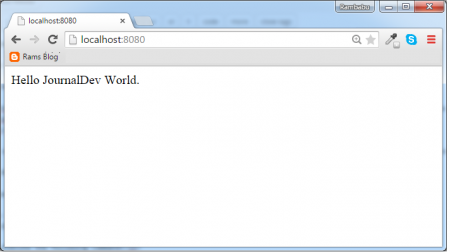 Now we are able to access our first Spring Boot MVC RESTful WebService.
If we observe this Spring Boot application, then we may get this question in our mind: who will provide all these things to our Spring Boot HelloWorld application?
- No imports
- No other XML configuration to define Spring MVC Components like Views,ViewResolver etc.
- No web.xml and No DispatcherServlet declaration
- No build scripts to create our Application war file
- No need to build war file to deploy this application
Answer to this question: It is the responsibility of Spring Boot Core Components, Groovy Compiler (groovyc) and Groovy Grape (Groovy’s JAR Dependency Manager). Spring Boot Components uses Groovy Compiler and Groovy Grape to provide some Defaults lime adding required imports, providing required configuration, resolving jar dependencies, adding main() method etc. As a Spring Boot Developer, We don’t need to worry all these things. Spring Boot Framework will take care of all these things for us. That’s the beauty of Spring Boot Framework. By this way, Spring Boot framework avoids lots of boilerplate code and Spring Configuration, reduces development time and increases productivity. Here we have not discussed much about Spring Boot Annotations, Spring Boot API, What is the use of main() method in Spring Boot Application etc. - a Guide.
Testen Sie Ihr Setup auf ccloud³
Registrieren Sie sich in der ccloud³ und erhalten Sie 200 € Startguthaben für Ihr Projekt – z. B. für eine PostgreSQL-VM mit automatischen Backups.