Today we will look into spring security role based access and authorization example.
Spring Security Role Based Access Authorization
In this post, we will discuss how to define, use and manage spring security roles like “USER”, “ADMIN” in Spring Web Application. In this example we are using Spring 4 MVC Security with In-Memory Store and Spring Java Configuration Feature to develop the application. That means we are not going to use web.xml file and also not writing even a single line of Spring XML Configuration. We will use “In-Memory Store” option to store and manage User Credentials. We are going to use Spring 4.0.2.RELEASE, Spring STS 3.7 Suite IDE, Spring TC Server 3.1 with Java 1.8 and Maven build tool to develop this example.
Matching infrastructure at centron
Hardening does not stop at the server: cloud firewalls filter traffic before it reaches the VM – centrally managed, no per-rule surcharge. Explore cloud firewalls →
Spring Security Role Based Access Authorization Example
Create a “Simple Spring Web Maven” Project in Spring STS Suite with the following details. Project Name: SpringMVCSecruityMavenRolesApp2.
<artifactId>SpringMVCSecruityMavenRolesApp</artifactId>

<build>
  <finalName>SpringMVCSecruityMavenRolesApp</finalName>
</build>
</project>
Update LoginSecurityConfig.java file to configure User roles like “USER” and “ADMIN”
LoginSecurityConfig.java
package com.journaldev.spring.secuity.config;

import org.springframework.beans.factory.annotation.Autowired;
import org.springframework.context.annotation.Configuration;
import org.springframework.security.config.annotation.authentication.builders.AuthenticationManagerBuilder;
import org.springframework.security.config.annotation.web.builders.HttpSecurity;
import org.springframework.security.config.annotation.web.configuration.EnableWebSecurity;
import org.springframework.security.config.annotation.web.configuration.WebSecurityConfigurerAdapter;

@Configuration
@EnableWebSecurity
public class LoginSecurityConfig extends WebSecurityConfigurerAdapter {

    @Autowired
    public void configureGlobal(AuthenticationManagerBuilder authenticationMgr) throws Exception {
        authenticationMgr.inMemoryAuthentication()
            .withUser("jduser").password("jdu@123").authorities("ROLE_USER")
            .and()
            .withUser("jdadmin").password("jda@123").authorities("ROLE_USER","ROLE_ADMIN");
    }

    @Override
    protected void configure(HttpSecurity http) throws Exception {

        http.authorizeRequests()
            .antMatchers("/homePage").access("hasRole('ROLE_USER') or hasRole('ROLE_ADMIN')")
            .antMatchers("/userPage").access("hasRole('ROLE_USER')")
            .antMatchers("/adminPage").access("hasRole('ROLE_ADMIN')")
            .and()
                .formLogin().loginPage("/loginPage")
                .defaultSuccessUrl("/homePage")
                .failureUrl("/loginPage?error")
                .usernameParameter("username").passwordParameter("password")
            .and()
                .logout().logoutSuccessUrl("/loginPage?logout");

    }
}
Code Explanation
In configureGlobal() method, we have added two users: One user with “ROLE_USER” role and another user with both “ROLE_USER” and “ROLE_ADMIN” roles. That means this second user will act as a Admin User. Like this we can configure any number of users and roles.
We can use either authorities(ROLE) or roles(ROLE) methods to configure Roles in our application.
Difference between authorities() and roles() methods:
- authorities() needs complete role name like “ROLE_USER”
- roles() needs role name like “USER”. It will automatically adds “ROLE_” value to this “USER” role name.
In configure() method, we have defined different URLs with required Access Roles.
antMatchers("/homePage") .access("hasRole('ROLE_USER') or hasRole('ROLE_ADMIN')") This code snippet configures that “/homePage” is available for both USER and ADMIN Roles.
.antMatchers("/userPage").access("hasRole('ROLE_USER')") .antMatchers("/adminPage").access("hasRole('ROLE_ADMIN')") This code snippet configures that “/userPage” is accessible by “USER” role only and .“/adminPage” is accessible by “ADMIN” role only. If other roles access these pages, we will get access “403 Access is Denied” Error message.
Update LoginController.java Controller file to define new URL access paths
LoginController.java
package com.journaldev.spring.web.controller;

import org.springframework.stereotype.Controller;
import org.springframework.web.bind.annotation.RequestMapping;
import org.springframework.web.bind.annotation.RequestMethod;
import org.springframework.web.bind.annotation.RequestParam;
import org.springframework.web.servlet.ModelAndView;

@Controller
public class LoginController {

    @RequestMapping(value = { "/"}, method = RequestMethod.GET)
    public ModelAndView welcomePage() {
        ModelAndView model = new ModelAndView();
        model.setViewName("welcomePage");
        return model;
    }

    @RequestMapping(value = { "/homePage"}, method = RequestMethod.GET)
    public ModelAndView homePage() {
        ModelAndView model = new ModelAndView();
        model.setViewName("homePage");
        return model;
    }

    @RequestMapping(value = {"/userPage"}, method = RequestMethod.GET)
    public ModelAndView userPage() {
        ModelAndView model = new ModelAndView();
        model.setViewName("userPage");
        return model;
    }

    @RequestMapping(value = {"/adminPage"}, method = RequestMethod.GET)
    public ModelAndView adminPage() {
        ModelAndView model = new ModelAndView();
        model.setViewName("adminPage");
        return model;
    }

    @RequestMapping(value = "/loginPage", method = RequestMethod.GET)
    public ModelAndView loginPage(@RequestParam(value = "error",required = false) String error,
    @RequestParam(value = "logout", required = false) String logout) {

        ModelAndView model = new ModelAndView();
        if (error != null) {
            model.addObject("error", "Invalid Credentials provided.");
        }

        if (logout != null) {
            model.addObject("message", "Logged out from JournalDEV successfully.");
        }

        model.setViewName("loginPage");
        return model;
    }

}<%@taglib prefix="c" uri="https://java.sun.com/jsp/jstl/core"%>
<a href="${pageContext.request.contextPath}/userPage">JD User</a> | <a href="${pageContext.request.contextPath}/adminPage">JD Admin</a> | <a href="javascript:document.getElementById('logout').submit()">Logout</a>
<h3>Welcome to JournalDEV Tutorials</h3>
<ul>
<li>Java 8 tutorial</li>
<li>Spring tutorial</li>
<li>Gradle tutorial</li>
<li>BigData tutorial</li>
</ul>
<c:url value="/logout" var="logoutUrl" />
<form action="${logoutUrl}" method="post" >
<input type="hidden" name="${_csrf.parameterName}" value="${_csrf.token}" />
</form>Here we have added three Menu like options at the top frame. “Logout” is already discussed in a previous post. New two links are:
- JD User: Accessible by both “USER” and “ADMIN” Roles
- JD Admin: Accessible only by “ADMIN” Roles
NOTE: In Real-time applications, we will show only “JD User” link to “USER” Role and hide “JD Admin” link. To test whether it is accessible by “USER” Role or not and also to see the exact error message, we have not hidden this link.
Add new adminPage.jsp file for “ADMIN” role
adminPage.jsp
<%@taglib prefix="c" uri="https://java.sun.com/jsp/jstl/core"%>
<h3>Welcome to JournalDEV Tutorials</h3>
<h3>Admin Page</h3>

<c:url value="/logout" var="logoutUrl" />
<form action="${logoutUrl}" method="post" >
  <input type="hidden" name="${_csrf.parameterName}" value="${_csrf.token}" />
</form>
<c:if test="${pageContext.request.userPrincipal.name != null}">
    <a href="javascript:document.getElementById('logout').submit()">Logout</a>
</c:if>
Add new userPage.jsp file for “USER” role
userPage.jsp
<%@taglib prefix="c" uri="https://java.sun.com/jsp/jstl/core"%>
<h3>Welcome to JournalDEV Tutorials</h3>
<h3>User Page</h3>

<c:url value="/logout" var="logoutUrl" />
<form action="${logoutUrl}" method="post" >
  <input type="hidden" name="${_csrf.parameterName}" value="${_csrf.token}" />
</form>
<c:if test="${pageContext.request.userPrincipal.name != null}">
    <a href="javascript:document.getElementById('logout').submit()">Logout</a>
</c:if>
We have completed our application development now. It’s time to see our project final structure and test the application. The Final Project Structure looks like this:
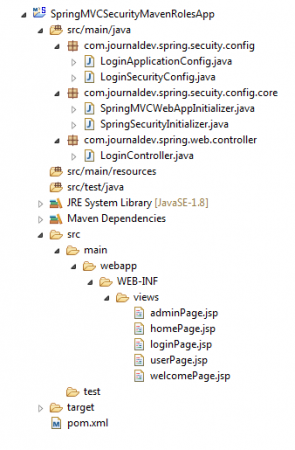
Right Click on Project in Spring STS IDE and select “Run AS >> Run on Server” option. It will access default Application welcome page as shown below:
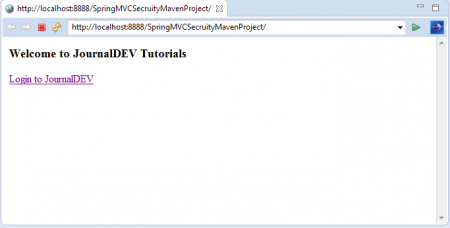
Click on “Login to JournalDEV” link.Now you are at Login Page.
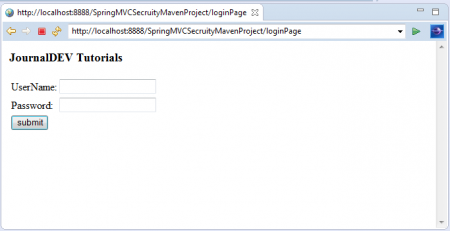
First login with “USER” Role Credentials: Username: jduser Password: jdu@123
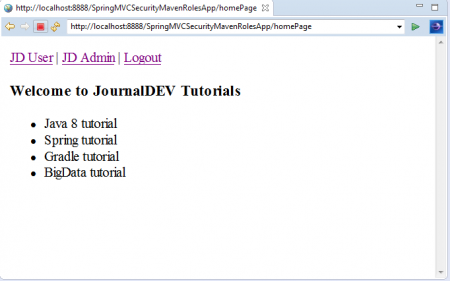
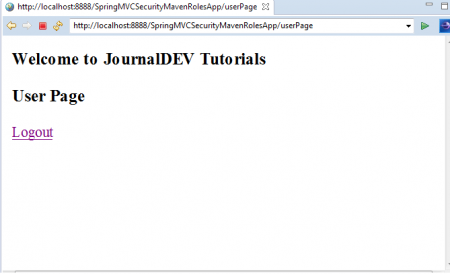
Now we will see Application HomePage with 3 Menu Options: “JD User”, “JD Admin” and “Logout”. Click on “JD User” link. As we have logged into application using “USER” Role Credentials, We can access this link as shown below.
Just use backword arrow in Spring STS IDE and this time click on “JD Admin” Link.
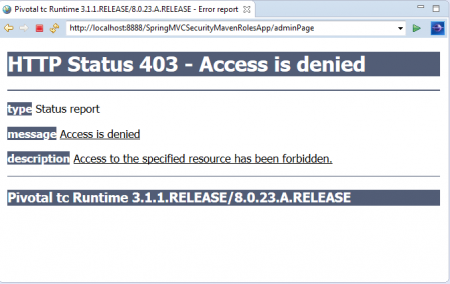
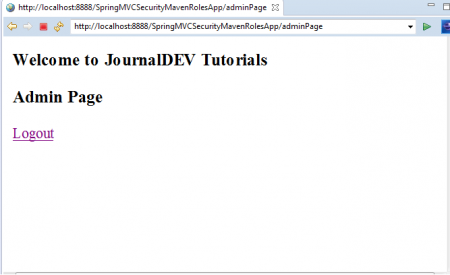
As we have logged in with “USER” Role Credentials, We cannot access this link. That’s why we saw this error message: “403 Access is denied”.9. Now Logged and again login with ADMIN Role Credentials Username: jdadmin Password: jda@123 This time we can access “JD Admin” Link successfully as shown below.
Test “Logout” link to Logged out of the Application.
That’s all about out guide to Spring Security Role Based Access Authorization.
Test your setup on ccloud³
Sign up for ccloud³ and receive €200 starting credit for your project.