
Welcome to Tomcat DataSource JNDI Example Tutorial
Actual benefit of DataSource comes when we use it with a JNDI Context. For example, connection pool in a web application deployed in a servlet container. Most of the popular servlet containers provide built-in support for DataSource through Resource configuration and JNDI context. This helps us in creating and using DataSource connection pool with just few lines of configuration. This tutorial is aimed to provide Tomcat DataSource JNDI configuration example. Apache Tomcat provide three ways to configure DataSource in JNDI context.
Application context.xml
This is the easiest way to configure DataSource, all we need is a context.xml file in META-INF directory. We have to define Resource element in the context file and container will take care of loading and configuring it. The approach is simple but it has some drawbacks;
- Since the context file is bundled with the WAR file, we need to build and deploy new WAR for every small configuration change. Same issue comes if your application works in distributed environment or your application needs to be deployed in different testing environments such as QA, IT, PROD etc.
- The datasource is created by container for the application usage only, so it can’t be used globally. We can’t share the datasource across multiple applications.
- If there is a global datasource (server.xml) defined with same name, the application datasource is ignored.
Server context.xml
If there are multiple applications in the server and you want to share DataSource across them, we can define that in the server context.xml file. This file is located in apache-tomcat/conf directory. The scope of server context.xml file is application, so if you define a DataSource connection pool of 100 connections and there are 20 applications then the datasource will be created for each of the application. This will result in 2000 connections that will obviously consume all the database server resources and hurt application performance.
server.xml and context.xml
We can define DataSource at global level by defining them in the server.xml GlobalNamingResources element. If we use this approach, then we need to define a ResourceLink from context.xml file of server or application specific. This is the preferred way when you are looking to share a common resource pool across multiple applications running on the server. Regarding resource link, whether to define it at server level context xml file or application level depends on your requirement.
Tomcat DataSource JNDI example in java web application
For the test data setup, please refer to my last article about JDBC DataSource Example.
Tomcat DataSource JNDI Configuration Example – server.xml
Add below code in the tomcat server.xml file. The code should be added in the GlobalNamingResources element. Also make sure that database driver is present in the tomcat lib directory, so in this case mysql jdbc jar have to be present in the tomcat lib.
<Resource name="jdbc/MyDB"
      global="jdbc/MyDB"
      auth="Container"
      type="javax.sql.DataSource"
      driverClassName="com.mysql.jdbc.Driver"
      url="jdbc:mysql://localhost:3306/UserDB"
      username="pankaj"
      password="pankaj123"
      maxActive="100"
      maxIdle="20"
      minIdle="5"
      maxWait="10000"/>
Here we are creating JNDI context with name as jdbc/MyDB which is a type of DataSource. We are passing database configurations in url, username, password and driverClassName attribute. Connection pooling properties are defined in maxActive, maxIdle and minIdle attributes.
Tomcat DataSource JNDI Resource Link Configuration – context.xml
Add below code in the server context.xml file.
<ResourceLink name="jdbc/MyLocalDB"
                global="jdbc/MyDB"
                auth="Container"
                type="javax.sql.DataSource" />
Notice that resource link name is different than global link, we have to use this name in our java program to get the DataSource.
Tomcat DataSource JNDI Example
Create a dynamic web application with name JDBCDataSourceTomcat and then create a Servlet with below code.
package com.journaldev.jdbc.datasource;

import java.io.IOException;
import java.io.PrintWriter;
import java.sql.Connection;
import java.sql.ResultSet;
import java.sql.SQLException;
import java.sql.Statement;

import javax.naming.Context;
import javax.naming.InitialContext;
import javax.naming.NamingException;
import javax.servlet.ServletException;
import javax.servlet.annotation.WebServlet;
import javax.servlet.http.HttpServlet;
import javax.servlet.http.HttpServletRequest;
import javax.servlet.http.HttpServletResponse;
import javax.sql.DataSource;

@WebServlet("/JDBCDataSourceExample")
public class JDBCDataSourceExample extends HttpServlet {
    private static final long serialVersionUID = 1L;

    protected void doGet(HttpServletRequest request, HttpServletResponse response) throws ServletException, IOException {
        Context ctx = null;
        Connection con = null;
        Statement stmt = null;
        ResultSet rs = null;
        try{
            ctx = new InitialContext();
            DataSource ds = (DataSource) ctx.lookup("java:/comp/env/jdbc/MyLocalDB");

            con = ds.getConnection();
            stmt = con.createStatement();

            rs = stmt.executeQuery("select empid, name from Employee");

            PrintWriter out = response.getWriter();
            response.setContentType("text/html");
            out.print("<html><body><h2>Employee Details</h2>");
            out.print("<table border=\"1\" cellspacing=10 cellpadding=5>");
            out.print("<th>Employee ID</th>");
            out.print("<th>Employee Name</th>");

            while(rs.next())
            {
                out.print("<tr>");
                out.print("<td>" + rs.getInt("empid") + "</td>");
                out.print("<td>" + rs.getString("name") + "</td>");
                out.print("</tr>");
            }
            out.print("</table></body><br/>");

            //lets print some DB information
            out.print("<h3>Database Details</h3>");
            out.print("Database Product: "+con.getMetaData().getDatabaseProductName()+"<br/>");
            out.print("Database Driver: "+con.getMetaData().getDriverName());
            out.print("</html>");

        }catch(NamingException e){
            e.printStackTrace();
        } catch (SQLException e) {
            e.printStackTrace();
        }finally{
            try {
                rs.close();
                stmt.close();
                con.close();
                ctx.close();
            } catch (SQLException e) {
                System.out.println("Exception in closing DB resources");
            } catch (NamingException e) {
                System.out.println("Exception in closing Context");
            }

        }
    }

}
Notice that I am using Servlet 3 Annotation based configuration and it will work in Tomcat 7 or higher versions. If you are using lower version of Tomcat then you need to do some modifications to the servlet code, to remove WebServlet annotation and configure in web.xml file. The part of servlet code that we are interested in;
ctx = new InitialContext();
DataSource ds = (DataSource) ctx.lookup("java:/comp/env/jdbc/MyLocalDB");
This is the way to get the JNDI resources defined to be used by the application. We could have written it in this way too;
ctx = new InitialContext();
Context initCtx  = (Context) ctx.lookup("java:/comp/env");
DataSource ds = (DataSource) initCtx.lookup("jdbc/MyLocalDB");
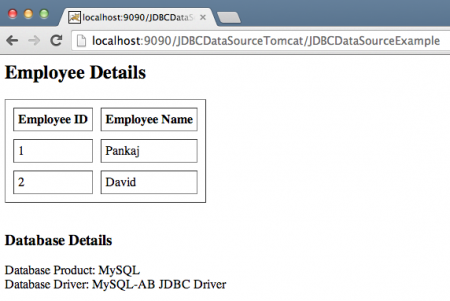
I am also printing some database information to check which database we are connected. Now when you will run the application, you will see following output.
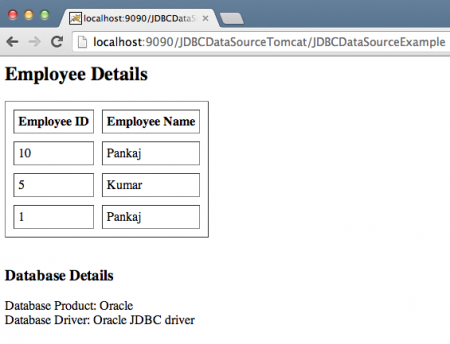
Let’s see how easy it is to switch the database server because we are using Tomcat DataSource. All you need is to change the Database properties. So if we have to switch to Oracle database, my Resource configuration will look like below.
<Resource name="jdbc/MyDB"
      global="jdbc/MyDB"
      auth="Container"
      type="javax.sql.DataSource"
      driverClassName="oracle.jdbc.driver.OracleDriver"
      url="jdbc:oracle:thin:@localhost:1521:orcl"
      username="hr"
      password="oracle"

      maxActive="100"
      maxIdle="20"
      minIdle="5"
      maxWait="10000"/>
And when we restart the server and run the application, it will connect to Oracle database and produce below result.
That’s all for Tomcat DataSource JNDI configuration example tutorial, you can define the resource in similar way in context.xml files too. Welcome to Tomcat DataSource JNDI Example Tutorial
